Creating users and token generation
Creating users and generating tokens for widget sessions.
Once you have registered to the platform and created a client, you should be able to call our APIs to create users and generate tokens to pass into an embedded component.
Types of access tokens for tenant users
There are 2 types of access tokens that can be created for a tenant user:
- Widget access tokens scoped to a user, which are used for embedded component initialisation using the
widget_authenticationscope. - Data access tokens scoped to a user which can be used with API Gateway’s endpoints using data scopes such as
accounts:readortransactions:read:allfor example.
Creating users
There are two ways to create a user to generate a token for.
Create a demo user through our admin-portal
To get started or for demo purposes, you can create a user via our admin portal:
- Log into admin-portal and navigate to
Moneyhub App - Usersand selectAdd Demo User - Select the tenant linked to your API client, along with the rest of the details on the form. Save the user.
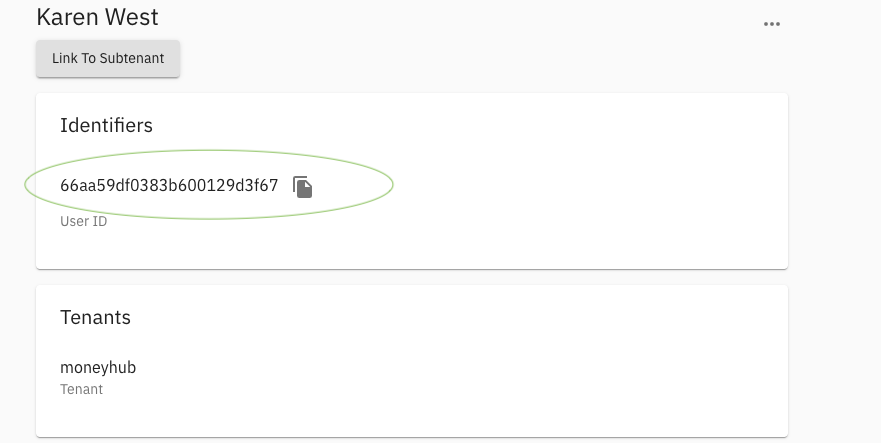
- Find the user in admin-portal, copy the
userIdto your clipboard for later use.
Create a user using our API
For your embedded component implementation, tenant users can be created using the POST /scim/users endpoint of our API. This endpoint requires a token with the scim_user:write scope. To request a bearer token for use against our API with this scope we recommend reading through our Authentication documentation and then calling our /oidc/token endpoint.
The Moneyhub API client library can also be used to create a tenant (scim) user, by cloning the repository, running npm ci, and then running the following command from the repository’s base directory:
ts-node examples/scim-user/register-scim-user.js -e [email protected]You will receive the following response once that user has been created successfully
{
  "id": "66b317a3b9e65500465bed71",
  "externalId": "aa1af48ba90c6357b1118bed46be4f6c",
  "meta": {
    "resourceType": "User",
    "created": "2024-08-07T06:43:47.000Z"
  },
  "name": {
    "givenName": "Alex",
    "familyName": "Taylor"
  },
  "emails": [
    {
      "value": "[email protected]",
      "primary": true
    }
  ]
}
GET created user
Tenant users can be retrieved using the GET /scim/users/ endpoint. This endpoint requires a token with the scim_user:read scope.
You will receive the following response for an existing user:
{
  "id": "66b317a3b9e65500465bed71",
  "externalId": "aa1af48ba90c6357b1118bed46be4f6c",
  "meta": {
    "resourceType": "User",
    "created": "2024-08-07T06:43:47.000Z"
  },
  "name": {
    "givenName": "Alex",
    "familyName": "Taylor"
  },
  "emails": [
    {
      "value": "[email protected]",
      "primary": true
    }
  ]
}
Creating tokens
Create a widget access token
Once you have created or retrieved your user, a user scoped access token is required to use an embedded component.
To get a client credentials token, you'll need to call our /token end point - see our authentication documentation for how to authenticate against this end point - and pass in the following body, along with any authentication fields specified in the authentication document:
| Field | Type | Description |
|---|---|---|
| grant_type | string | Will always be client_credentials for this instance |
| scope | string | The scopes you wish to request for the access token. This will be widget_authentication for this instance. |
To create an API token for an existing user you can use the following examples, using the userId of the demo user, and the widget_authentication scope.
Moneyhub-api-client example:
const data = await moneyhub.getClientCredentialTokens({
  scope: "widget_authentication",
  sub: userId,
})

return data
You will get a response with an access_token like the following example:
{
  "access_token": "eyJhbGciOiJSUzI1NiIsInR5cCI6ImF0K2p3dCIsImtpZCI6IkQ5SkFObVlmU0dfa2J0MktScFRLbzdRQ05IMl9SSy0wYTc4N3lqbTA3encifQ.eyJ0ZW5hbnRfaWQiOiI5NGQ0NjI2OWIwYzJiN2VjY2UzNDFjMDk0ZmRiOWE4MDljZDBhNDliNDNhNGE4YjAzZjNlYzgzNDU4YTc4NmEwIiwidXNlcl9pZCI6ImIwZTIwZjZjMTU2NzFmMzM3OTNlY2QxMjBmMWFjOWJlNGIxYmU1N2QxZjVlZWQzYmQyZDM1MmNkMDYxYTE2OWUiLCJqdGkiOiJaOXdOcFB3ZkxZUG1rWjN2OU95RkgiLCJzdWIiOiI2NjgyYWRjZTA4ZGM5ZDAwMTBiZDdlZGUiLCJpYXQiOjE3MTk4NDE5NDMsImV4cCI6MTcxOTg0OTE0Mywic2NvcGUiOiJhY2NvdW50czpyZWFkIiwiY2xpZW50X2lkIjoiODI0MjM5NDctOWQ3MS00MmIzLWEzZTAtODZkMWYwYWIwOTFmIiwiaXNzIjoiaHR0cDovL2lkZW50aXR5LmRldi4xMjcuMC4wLjEubmlwLmlvL29pZGMiLCJhdWQiOiI4MjQyMzk0Ny05ZDcxLTQyYjMtYTNlMC04NmQxZjBhYjA5MWYifQ.EinjXH3xOkA5ucW7htiyFDQAeZU8JsuDXOXf6oofCEoljbHDeJo0a9b9kuKaB_fqDUskvqivewylWaaXW1qe0pqmbO9Y2B868eV8dgMdd4V6IfXXvlhQ-xCaMNtAFUoQ7tHmEB7PTteildENbzTt21D5u5elMNBnyzL-2xl0_P2alYDj01_pIGPoCqGHBJoIjJHr0_inEoxDjO0bhTFtfqgO3KPGnqlqZ80e1OL8c35MuZrOfV9swWPuQNJJ0X1EslOhTq0bL0lc5NphY6b1WG33yChnwzaoH4vNOAB8F_p3o5w5ycLP5_EJtgjz1sJCUH2HyxnkT0EdeSkRQ2EwjA",
  "expires_at": 1719849143,
  "token_type": "Bearer"
}
The access_token returned in the response body can then be used to instantiate the embedded component.
Using a widget token
Continue with our guide: Instantiate a widget
Create a data access token
Using your Tenant-linked API client you will be able to create tokens for those users to access any of the endpoints listed in our API Gateway (https://api.moneyhub.co.uk/docs/).
Accessing a tenant's data works the same way as an API user. The user id is required and the Moneyhub API client can be used to generate a token and access their data.
A list of examples can be found here: https://github.com/moneyhub/moneyhub-api-client/tree/master/examples
To create an API token for an existing user you can use the following method with the moneyhub-api-client:
const data = await moneyhub.getClientCredentialTokens({
  scope: "accounts:read",
  sub: userId,
})

return data
If successful you should see in the response:
{
 "access_token": "eyJhbGciOiJSUzI1NiIsInR5cCI6ImF0K2p3dCIsImtpZCI6IkQ5SkFObVlmU0dfa2J0MktScFRLbzdRQ05IMl9SSy0wYTc4N3lqbTA3encifQ.eyJ0ZW5hbnRfaWQiOiI5NGQ0NjI2OWIwYzJiN2VjY2UzNDFjMDk0ZmRiOWE4MDljZDBhNDliNDNhNGE4YjAzZjNlYzgzNDU4YTc4NmEwIiwidXNlcl9pZCI6ImIwZTIwZjZjMTU2NzFmMzM3OTNlY2QxMjBmMWFjOWJlNGIxYmU1N2QxZjVlZWQzYmQyZDM1MmNkMDYxYTE2OWUiLCJqdGkiOiJaOXdOcFB3ZkxZUG1rWjN2OU95RkgiLCJzdWIiOiI2NjgyYWRjZTA4ZGM5ZDAwMTBiZDdlZGUiLCJpYXQiOjE3MTk4NDE5NDMsImV4cCI6MTcxOTg0OTE0Mywic2NvcGUiOiJhY2NvdW50czpyZWFkIiwiY2xpZW50X2lkIjoiODI0MjM5NDctOWQ3MS00MmIzLWEzZTAtODZkMWYwYWIwOTFmIiwiaXNzIjoiaHR0cDovL2lkZW50aXR5LmRldi4xMjcuMC4wLjEubmlwLmlvL29pZGMiLCJhdWQiOiI4MjQyMzk0Ny05ZDcxLTQyYjMtYTNlMC04NmQxZjBhYjA5MWYifQ.EinjXH3xOkA5ucW7htiyFDQAeZU8JsuDXOXf6oofCEoljbHDeJo0a9b9kuKaB_fqDUskvqivewylWaaXW1qe0pqmbO9Y2B868eV8dgMdd4V6IfXXvlhQ-xCaMNtAFUoQ7tHmEB7PTteildENbzTt21D5u5elMNBnyzL-2xl0_P2alYDj01_pIGPoCqGHBJoIjJHr0_inEoxDjO0bhTFtfqgO3KPGnqlqZ80e1OL8c35MuZrOfV9swWPuQNJJ0X1EslOhTq0bL0lc5NphY6b1WG33yChnwzaoH4vNOAB8F_p3o5w5ycLP5_EJtgjz1sJCUH2HyxnkT0EdeSkRQ2EwjA",
 "expires_at": 1719849143,
 "token_type": "Bearer"
}
Using a data access token
Accessing a tenant's data works the same way as an API user. To get data scoped to a user, using the token pass in {token: access_token} as the second parameter to any moneyhub data access function.
Moneyhub API-Gateway API Reference
Moneyhub-api-client example:
  const data = await moneyhub.getAccounts({}, {
    token: access_token
  })
Up next: now you should have everything you need to instantiate an embedded component: Instantiate a widget
Updated 5 months ago