API Clients
You can register an OAuth client through our Admin portal. We will then generate a client_id and client_secret corresponding to your client. These credentials will be used to authenticate your client on every route of our Auth API.
To correctly authenticate your client, you will need to send your client credentials in the Authorization header in the following format:
Authorization: Basic Base64_encode(<client_id>:<client_secret>)
Accounts authorisation
When using our accounts authorisation API you will be able to connect using a client_secret_basic client authentication but we suggest to use this authentication only when you start using the API.
Below we outline the settings that API clients need in order to be used in Production but you should configure your API client that way as soon as you can.
Payments authorisation
When using our payments authorisation API you can't use client_secret_basic client authentication, instead you will need the following settings:
- Either a <<glossary:JWKS>> registered or a jwks_uri configured, i.e. either the <<glossary:JWKS>> or JWKS_URI field filled in.
- Client Authentication configured to be
private_key_jwt - Request Object signing alg configured to be one of the RS_, ES_ or PS* algorithms
- ID token signing alg configured to be one of the RS_, ES_ or PS* algorithms
- Response type set to be
codeorcode id token - Grant types to be
authorization_code,refresh_tokenandclient_credentials. You will also needimplicitif id token is set in the response type
Production
A production API client must have the following settings:
- Either a <<glossary:JWKS>> registered or a jwks_uri configured, i.e. either the <<glossary:JWKS>> or JWKS_URI field filled in.
- Client Authentication configured to be
private_key_jwt - Request Object signing alg configured to be one of the RS_, ES_ or PS* algorithms
- ID token signing alg configured to be one of the RS_, ES_ or PS* algorithms
- Response type set to be
code id_token - Grant types to be
authorization_code,refresh_token,client_credentialsandimplicit - All of the redirect uris are required to be https://, please remove any uris that use http://
These are a couple of security enhancements that can be implemented on your side: - A nonce to be added to the request object when generating an authorization url (OpenId Nonce) - The same nonce value needs to be used when exchanging the authorization code for the token set at the end of the authorization process.
Difference between Production and Sandbox Modes
1. Client authentication must be private_key_jwt. You can learn more about this authentication mode here or here.
There are many OpenID Connect compliant libraries that will perform this authentication for you.
To summarise you don't need to pass an authorization header, but instead you should send a form post with the following values in the body:
1. `client_assertion_type` = `"urn:ietf:params:oauth:client-assertion-type:jwt-bearer"`
2. `client_assertion` = <<glossary:JWT>> signed with your private key with the following claims:
    1. `iss` - your client id
    2. `sub` - your client id
    3. `jti` - A unique identifier for the token, which can be used to prevent reuse
    4. `aud` - our token endpoint, i.e. [https://identity.moneyhub.co.uk/oidc/token](https://identity.moneyhub.co.uk/oidc/token)
    5. `iat` - the time at which the token was issued
    6. `exp` - the time at which the token will expire
2. Response type must be set to code id_token. This means that you will receive the authorization code along with an id token at your redirect uri.
The id token also needs to be sent back along with the auth code to finalise a connection or payment.
You can use the id token as a detached signature to verify the interaction has not been tampered with.
3. You will receive the params in your callback in the hash fragment rather than in query params. If your callback is only server side you will need to make some changes as parameters as part of a hash fragment can only be handled in the front end.
We suggest the following approach:
1.- Backend checks if there are query params in the callback
2.- If query params are not found send back html response with javascript to get the params from the hash fragment to send back to the server
This is an example on how a simple page can handle hash fragments and reload the page to make them available as query params for the server to consume:
<!DOCTYPE html>
<html>
  <body>
    <script>
      function extractHash() {
        if (window.location.href.indexOf("#") >= 0)
          window.location = window.location.href.replace("#", "?")
        else
          window.location = window.location.href + "?"
      }
      window.onhashchange = extractHash
      extractHash()
    </script>
  </body>
</html>
JWKS Key Set
Example creating <<glossary:JWKS>> using the Moneyhub api client
node examples/jwks/create-jwks.js

Options

  --key-alg string
  --key-use string
  --key-size number
  --alg string
Public keys - This can be used as the <<glossary:JWKS>> in your API client configuration in the Moneyhub Admin portal
Private keys - This can be used as the keys value when configuring the moneyhub api client
To configure your API client you will need to generate a <<glossary:JWKS>> and have access to the public and private keys separately
The public key needs to be added as the <<glossary:JWKS>> in your API client configuration in the Moneyhub Admin portal.
The private key needs to be used as part of the configuration of the moneyhub api client or your openid client.
The easiest way to generate a valid <<glossary:JWKS>> is using our Moneyhub API client (Moneyhub API client).
The client has the method createJWKS() and there is an example of how to use it when cloning the repo under the examples folder.
The <<glossary:JWKS>> can also be used to set up a <<glossary:JWKS>> Endpoint as described in our Authentication section
Error log
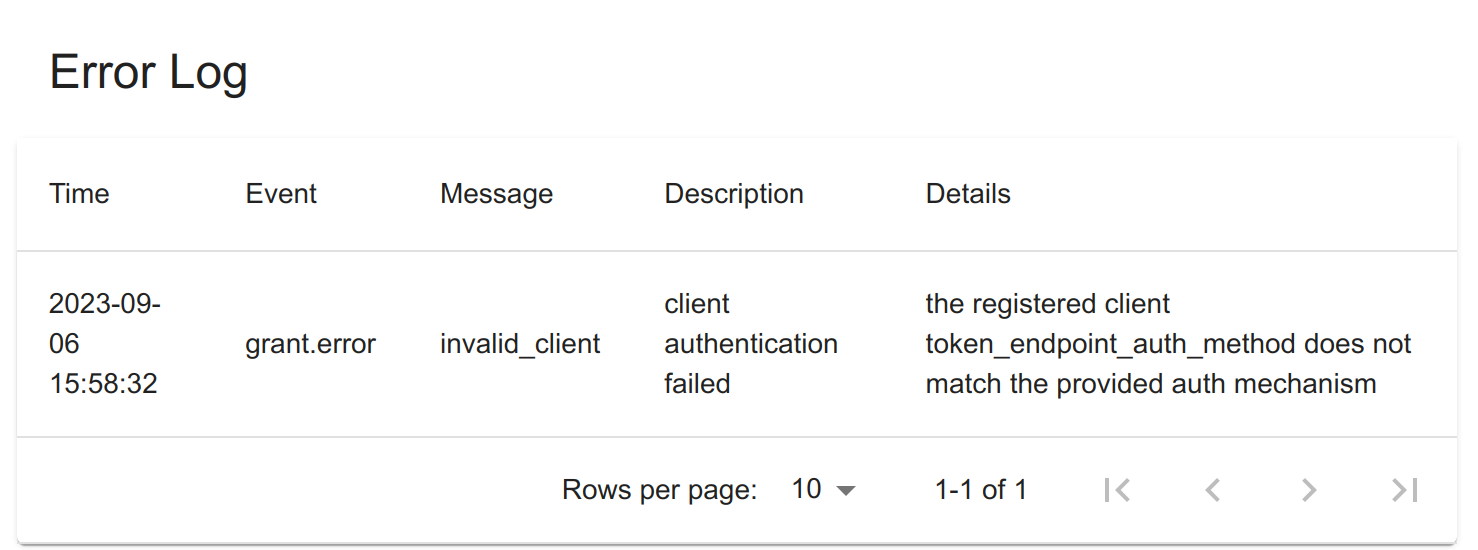
If you encounter an error related to authentication or configuration of your API Client then you can find further detail in the Error log section of the API Client details in the Admin Portal.

Updated 5 months ago
