Affordability Widget
Affordability widget parameters and implementation.
Affordability Widget
Our Affordability widget works in conjunction with our wider Affordability Service. It allows clients to quickly setup an embedded user journey to enable customers to connect their bank account(s) to form part of an affordability check.
The output from this is then written to an affordability report than can later be accessed by the client underwriting teams. Either via dashboards in our Admin Portal or via API (ref:get_affordability-reportid)
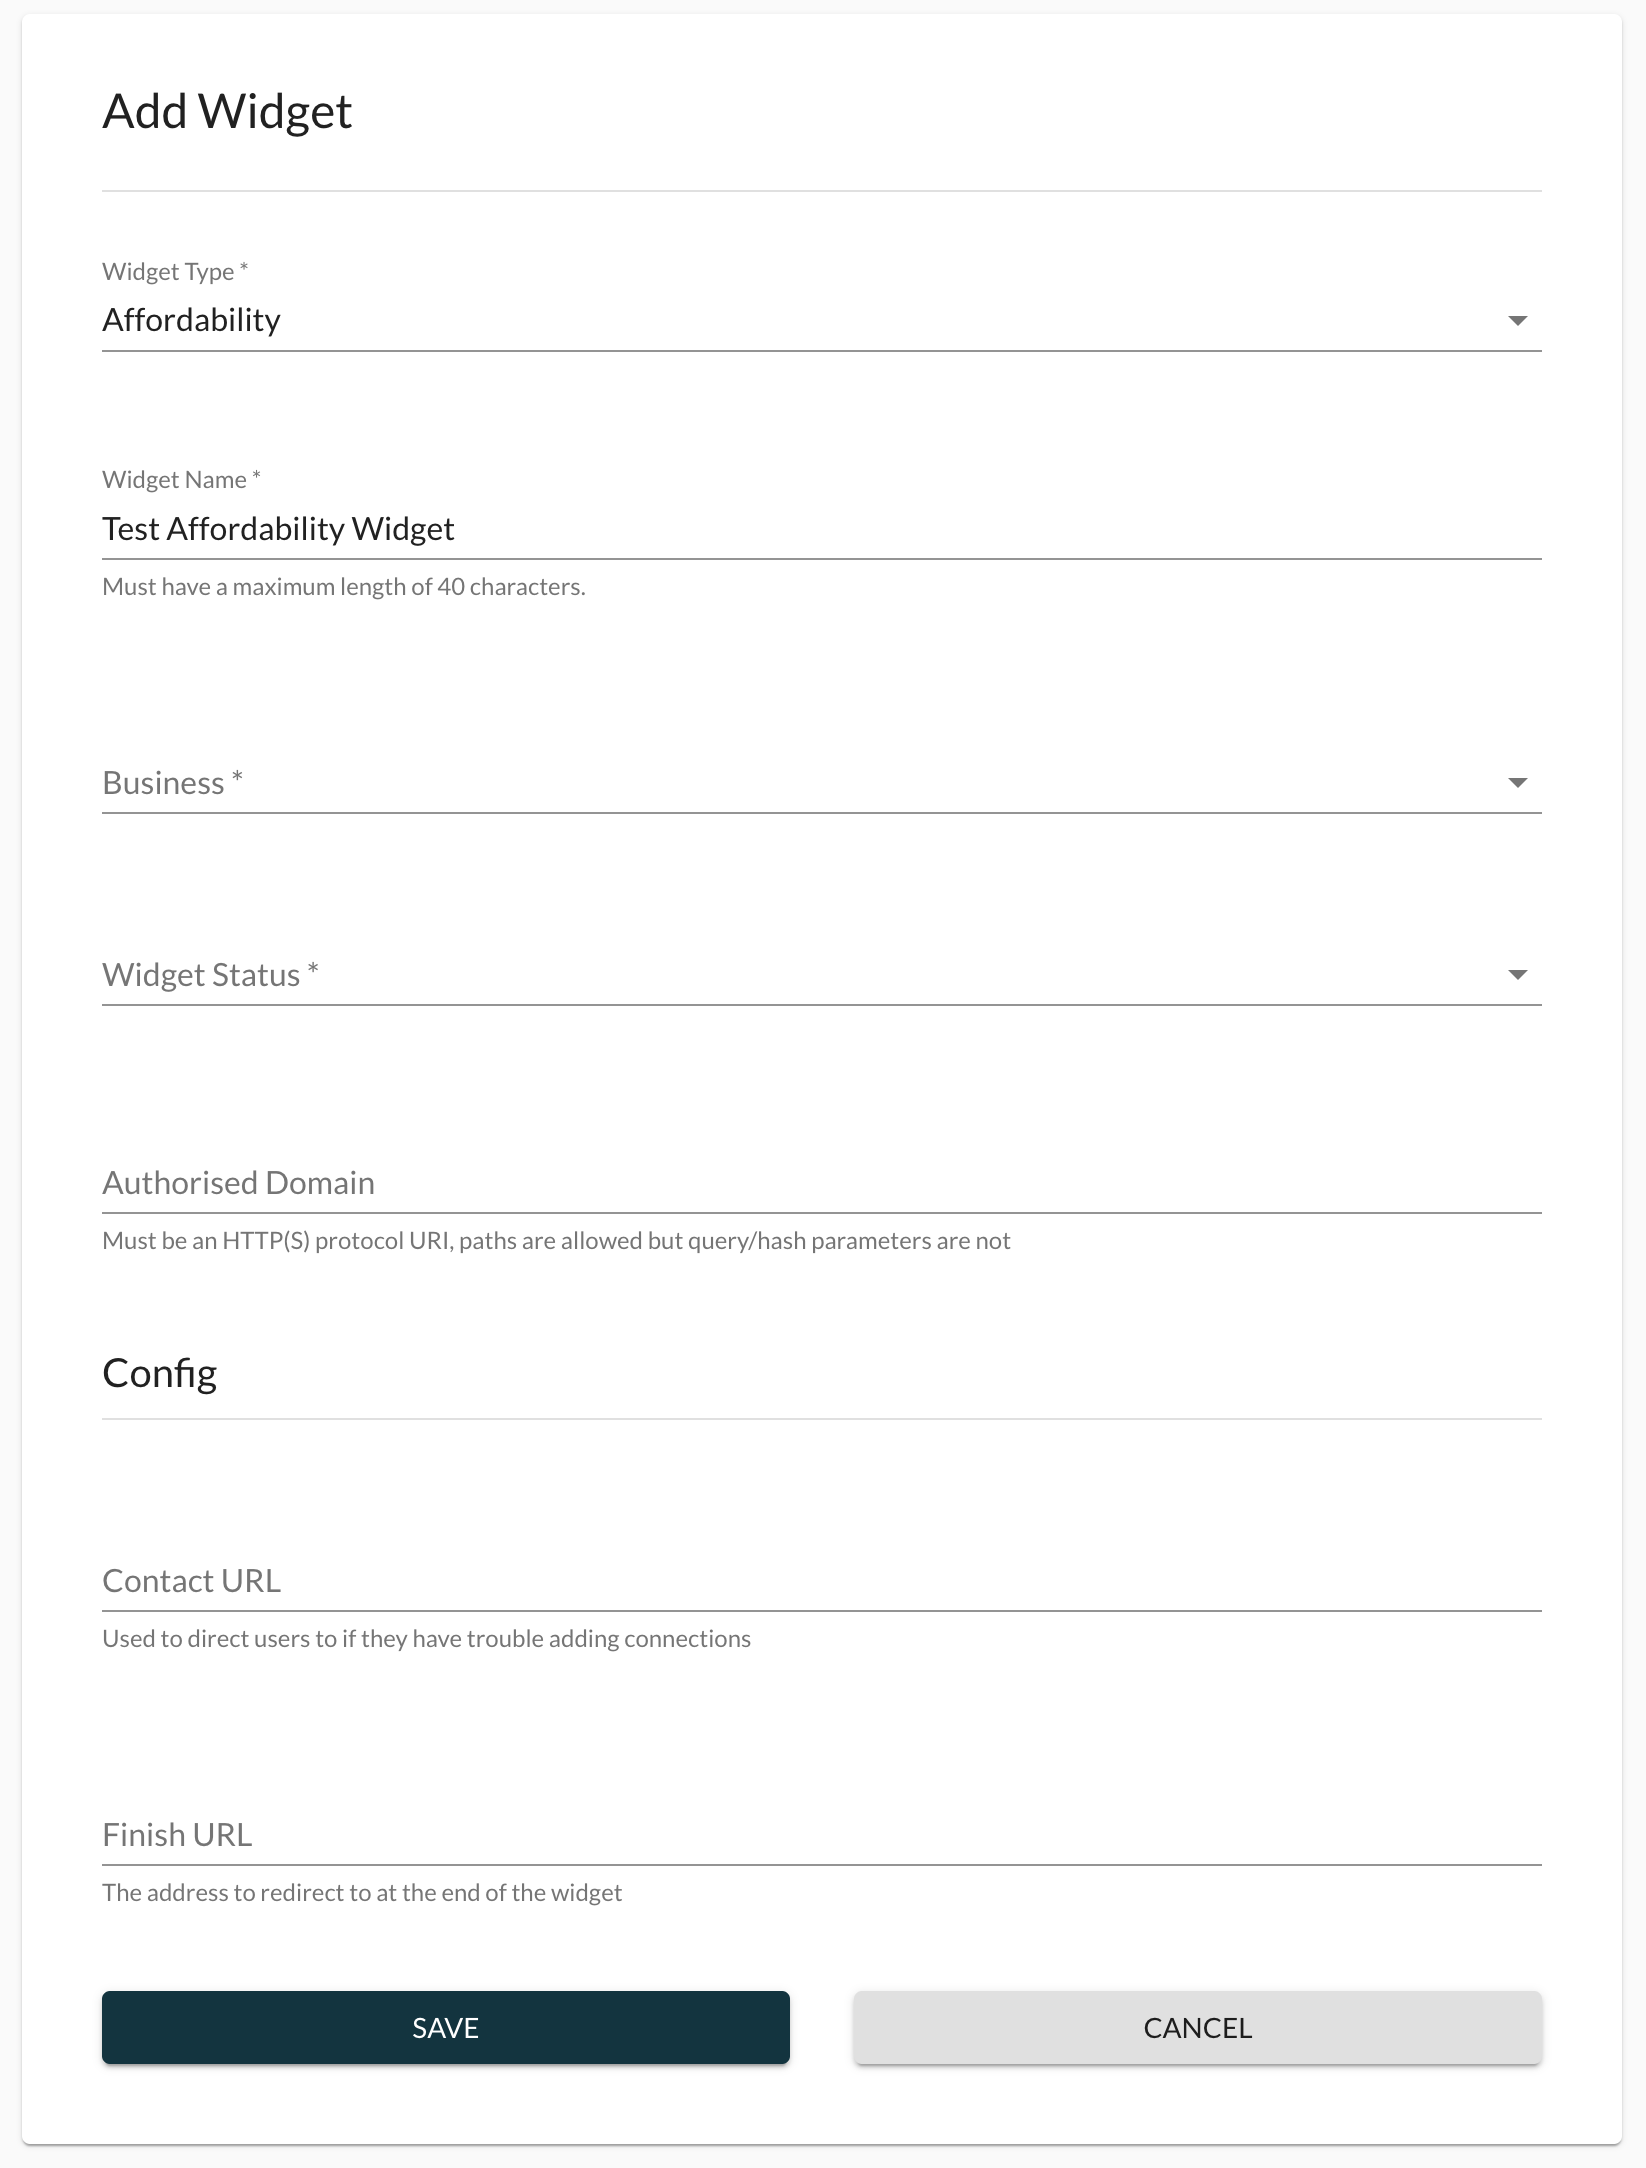
The Widget itself is configured via the 'My Widgets' section of the Moneyhub Admin portal (access will be setup as part of the onboarding process)
Click 'ADD NEW' at the top of the page

On the setup page choose 'Affordability' as the widget type
Give your widget an identifiable name (this is only used in the 'My Widgets' section of Admin Portal, it does not appear on the widget itself).
Select your Business from the pulldown
Choose whether you want your widget in Sandbox or Live mode in 'Widget Status'
Widgets can be hosted by Moneyhub or self hosted. If you wish to host the widget in your own infrastructure add your HTTPS authorised domain. If left blank Moneyhub will host.
Under Config add the return ("finish") URL you wish to send the user to on completion, and if you wish, a URL that the user will be given a link to if they are having trouble adding their first connection and wish to get in touch.
On saving the widget you can then view the widget and access the created code snippet and a preview URL to allow early testing and implementation. Both items can be accessed from the three dot menu (top right)

Code snippet
This is an example code snippet that can be obtained from the widget page in our admin portal:
<div id="root"></div>
<script src="https://s3.eu-west-1.amazonaws.com/widgets.moneyhub.co.uk/widgets.bundle.js"></script>
<script>
  window.moneyhub.init({
    elementId: "root",
    type: "affordability",
    widgetId: "831b0bce-130e-478c-a064-d685bd8a3cfc",
    params: {
      externalUserId: "external-user-id",
      email: "[email protected]",
      name: "Sarah Green",
      state: "client-state"
    },
  })
</script>
Custom Parameters
The following data items can be included in the widget to allow later identification of individual affordability reports in the Reports Dashboard
name: User nameemail: User emailexternalUserId: User id from client (*see below)state: State value that will be forwarded at the end of the journey for reconciliation
All of the above are optional, although we do recommend providing an external user ID in every case so that you are able to accurately cross-reference Moneyhub affordability reports with your own ID/reference number for the user or application.
Setting the external user IDNote that for the external user ID it is highly recommended to pass this in via the URL path rather than as one of the query parameters. Please see the section below for details of how to do this.
Query params and external user IDWe recommend to url encode the values of the query params and external user ID (if set separately in the URL path) so they can be saved and forwarded correctly.
The values should also be kept relatively short.
Identifying Affordability Reports Based on Your Own Reference Number/ID
The best way to ensure that you are able to cross-reference Moneyhub affordability reports with your own reference number or ID is to ensure that you pass it to us in the "external user ID" parameter as part of the URL path (not the query parameters).
The way that you should set up the pages of your site that will host the widget is as follows:
- Make the external user ID part of the URL path of your site across any site pages that will use the affordability widget (e.g. for a reference of "REF123" you might use something like: `https://our-site.com/affordability/external-user-id/REF123)
- When you initialise the widget as per the code snippet in the section below (i.e. using
window.moneyhub.init), ensure that your site takes the reference number from the URL path and passes it through to the widget via theparams.externalUserIdproperty. If you are using libraries such as React this might involve taking the external user ID from the URL path using React Router and passing that down to the component where the widget is initialised as a prop, and then passing it in that way. Let us know if you need any assistance with this process.
Moneyhub-Hosted Widget
We also offer to host the widget under our domain, this can be accessed from the widget page in our admin portal under the 'Preview Widget' option. The custom parameters mentioned above can all be passed as query parameters if desired, although we highly recommend using the version of the widget URL that includes the external user ID in the URL path (as in the example below) instead of the query parameter, and to use that value to hold your unique identifying reference number or ID for the user or application.
This is an example url passing custom params and the recommended URL format that includes the external user ID:
https://identity.moneyhub.co.uk/widget-pages/831b0bce-130e-478c-a064-d685bd8a3cfc/external-user-id/external-user-id-value?name=name-value&email=email-value&state=state-valueNote that the external user ID in the example above is part of the URL path rather than the query parameters - this is highly recommended over using the query parameter.
If you do not need to cross-reference the affordability reports with your own unique reference, then you can use the shorter format of the URL as per this example:
https://identity.moneyhub.co.uk/widget-pages/831b0bce-130e-478c-a064-d685bd8a3cfc?name=name-value&email=email-value&state=state-valuehttps://identity.moneyhub.co.uk/widget-pages/831b0bce-130e-478c-a064-d685bd8a3cfc?name=name-value&email=email-value&state=state-value&externalUserId=external-user-id-value
Query params and external user IDWe recommend to url encode the values of the query params and external user ID (if set separately in the URL path) so they can be saved and forwarded correctly
Affordability Widget Journey
On initialising the widget the user would see a list of supported banks (in this example we are only showing our test banks)

Once a bank is selected the user is shown a consent screen explaining what data we are requesting and its purpose.

On clicking Approve the user will be taken into their own banks flow (Mock Bank example below)


Once the bank connection has been completed (including standard PSD2 SCA security) the user is returned to a confirmation page, on this page the user can add additional bank accounts to build a fuller financial picture or if they have added all their accounts they can complete the application.

On clicking Submit Application the userId, reportId and state are returned via the configured Finish URL.
Receiving parameters at the end of the Journey
After a user has connected accounts and has submitted the data we will redirect to the finish url that was configured for the widget with the following data as query params:
userId: Moneyhub user id that was created during the affordability journeyreportId: Id of the affordability report that was createdstate: State value that was passed when initialising the widget
This is an example finish url:
https://www.moneyhub.com/finish?reportId=9edd3853-1a25-44fe-a563-abcc513904fa&userId=63d24f731e23f51590331b1e&state=state-value
Test accounts
If you want to test the end to end journey in our Sandbox environment we have 2 discrete test users
'affordability' (acct p/w is password123)
'affordabilityIrregularIncome' (acct p/w is password123)
This info is required when you select 'Moneyhub Mock' as the source bank where the account is held as part of the widget journey.
Updated 5 months ago